How to Install Minikube on a Mac
Note: This is a living document and will keep evolving with time.
Kubernetes is an open-source container orchestration platform. Developed by Google, it has transformed how businesses manage their application infrastructure at scale. But I’m guessing you already knew that because you’re reading this article.
Since Kubernetes is often used to manage large applications, it can seem like a challenge to tinker with it in local development environments. But it is still essential for some use cases like:
Beginners looking to get into Kubernetes without the hassle of managing a cloud setup.
Hobbyists trying to tinker with Kubernetes to understand it better.
Development teams taking Kubernetes for a quick spin to decide if it is the correct platform to deploy their application.
Application developers testing smaller applications on their local machines before deploying to a production environment.
Notice that I didn’t mention anything along the lines of teams testing large applications as a use case. Teams working on large applications use cloud-based testing and staging environments as local machines often don’t have the resources to re-create the required production environments. For them, local Kubernetes installations might work for a portion of their application but will be too limited for anything more.
In this article, you will learn how to set up a simple Kubernetes cluster on your local MacOS-based machine using Minikube. This article assumes a familiarity with basic virtual machine and container concepts, using the command line, Homebrew, and Docker.
What is Minikube?
The Kubernetes documentation gives a good definition of Minikube that I’m going to reiterate here: Minikube is a lightweight Kubernetes implementation that creates a VM on your local machine and deploys a simple cluster containing only one node.
So, a tool to create a simple Kubernetes cluster on your local machine that has only one node. Not quite enterprise-grade but more than good enough for the use cases that we described earlier. A recent update to note is that Minikube now supports multi-node clusters but that setup is slightly more advanced and beyond the scope of this article.
Minikube is free and open-source software that is developed and maintained by the Kubernetes team. In a way, it can be seen as the “official” Kubernetes-on-local-machine tool and is the most popular tool for this purpose. That being said, Minikube is not the only tool available to install Kubernetes on your local machine. Kind is another popular tool to do the same job. The Docker Desktop application also enables you to create a single-node cluster and has a graphical interface to do so. Some lightweight Kubernetes distributions like k0s, k3s, and Microk8s can also be used to run Kubernetes on your local machine but their main use case is to run production-grade Kubernetes in constrained environments rather than testing and tinkering. We will stick with Minikube in this article.
Docker and Other Requirements
According to its documentation, Minikube can be deployed as a VM, a container, or on bare-metal. It offers a variety of drivers for these environments. This article focuses on installing Minikube with Docker, the preferred driver on MacOS.
Note for advanced users: I understand that Kubernetes has deprecated the Docker runtime as it is not directly CRI compatible. This article’s goal is to set up Minikube in its most basic form so that people can get started easily without worrying about CRI compatibility.
The Docker driver deploys Minikube as a Linux container and requires the Docker Engine to be installed on the local machine (numerous things in the Docker ecosystem are called Docker— don’t worry if you feel confused—learn more about Docker’s internals instead). Since the Docker Engine works natively only on Linux (for Linux containers), you will need to set up a virtual machine (VM) on your Mac that runs Linux. Enter Docker Desktop for Mac.
Docker Desktop is an application that handles every Docker-related requirement in a single package and is available for all major operating systems. Among other things, it provisions a Linux VM and sets up the Docker Engine on it. It also includes the Docker CLI, a command-line tool to interact with the Docker Engine.
You’ll also need to ensure that your computer has at least 2 CPU cores and at least 4 GB RAM. This should not be a problem on most newer computers but if you’re using an older machine, you should check the requirements for Docker Desktop and Minikube thoroughly. Although Minikube states a minimum requirement of 20 GB of free disk space, I’d recommend that you have at least 60–80 GB free on your computer. The Mac runs into all kinds of performance issues when there’s not enough free disk space and I believe that it’s not worth pushing the limits on that front.
A note about Docker Desktop’s payment terms: Docker Desktop is free for individuals for personal use, teams for educational use or in non-commercial open-source projects, and small businesses (fewer than 250 employees and less than USD 10 million in revenue). If you don’t fall into one of those categories, choose a paid plan that suits you best or use an alternative like Colima or Podman.
Installation Process
First, install Docker Desktop on your Mac. The easiest way to do so is to get the .dmg file from Docker’s website.
Next, install Minikube and kubectl (the command line tool to interact with Kubernetes) using Homebrew. Note that kubectl will show up as kubernetes-cli in the list of installed packages.
❯ brew install minikube kubectlI'm suggesting Homebrew because of the convenience and standardised installation method that it offers. You can find other methods to install these tools in their respective documentations.
You can check that everything has been installed properly by checking the version numbers of the various tools.
❯ docker --version
❯ minikube version
❯ kubectl version
Start Minikube and Verify
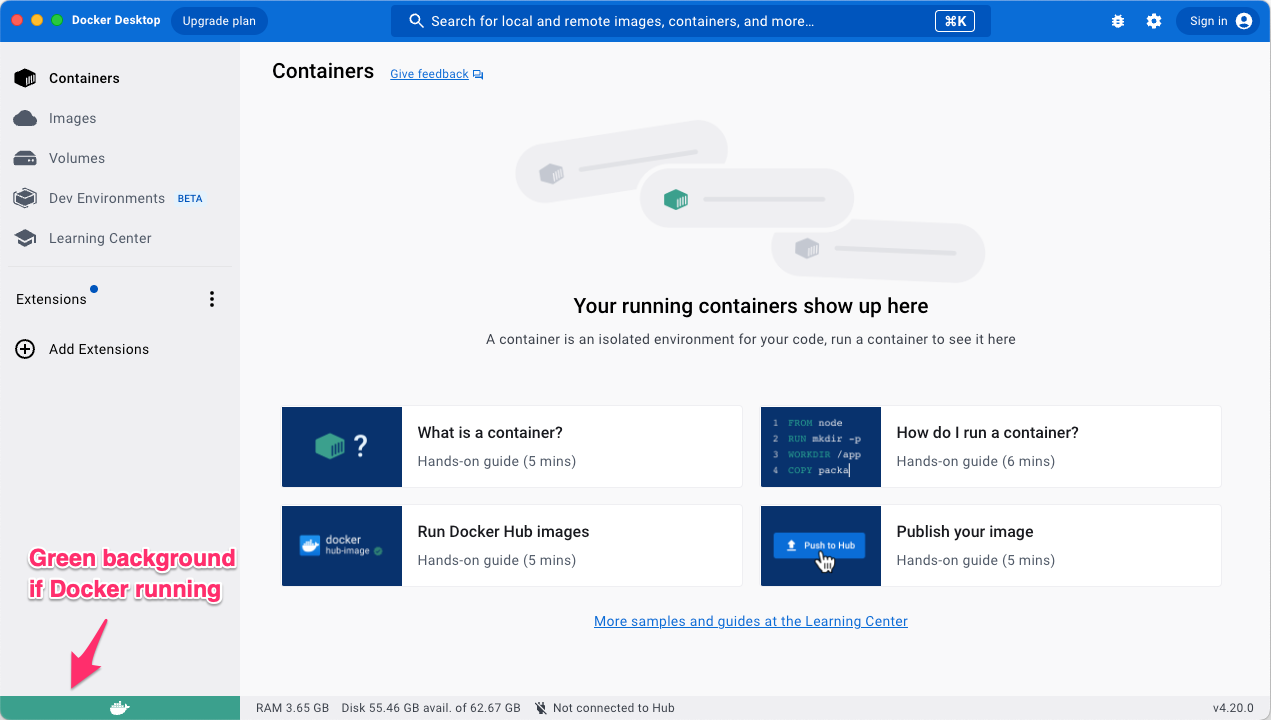
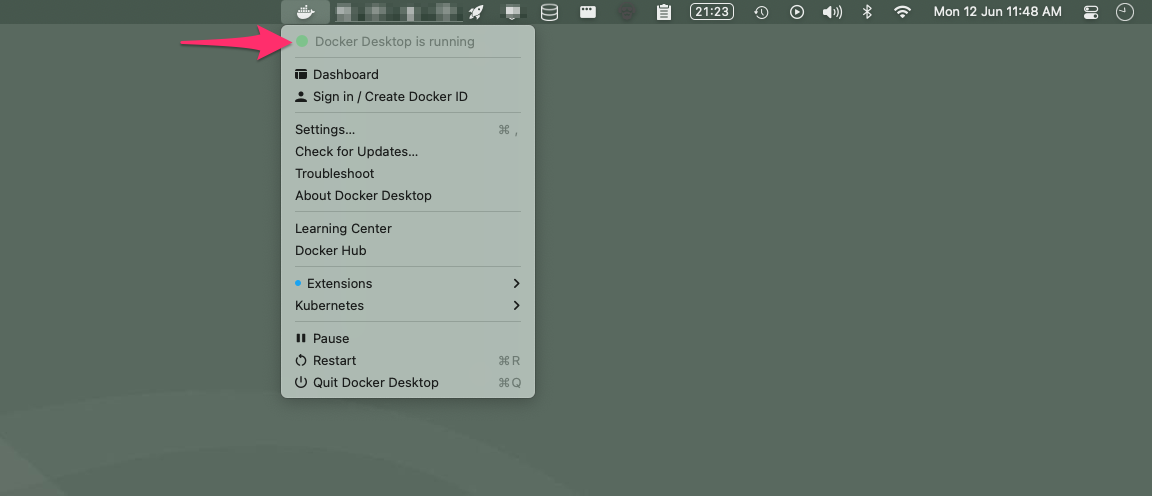
Docker needs to be running to start Minikube. You can cross-check this by ensuring that the thin band at the bottom of the app’s left sidebar (which has the Docker logo) has a green background. You can also click the Docker icon in the menu bar to see Docker’s status.
If Docker is running, open a terminal window and type in minikube start. You should see an output on the following lines:
❯ minikube start
😄 minikube v1.30.1 on Darwin 13.3.1 (arm64)
✨ Using the docker driver based on user configuration
📌 Using Docker Desktop driver with root privileges
👍 Starting control plane node minikube in cluster minikube
🚜 Pulling base image ...
🔥 Creating docker container (CPUs=2, Memory=4000MB) ...
🐳 Preparing Kubernetes v1.26.3 on Docker 23.0.2 ...
▪ Generating certificates and keys ...
▪ Booting up control plane ...
▪ Configuring RBAC rules ...
🔗 Configuring bridge CNI (Container Networking Interface) ...
▪ Using image gcr.io/k8s-minikube/storage-provisioner:v5
🔎 Verifying Kubernetes components...
🌟 Enabled addons: storage-provisioner, default-storageclass
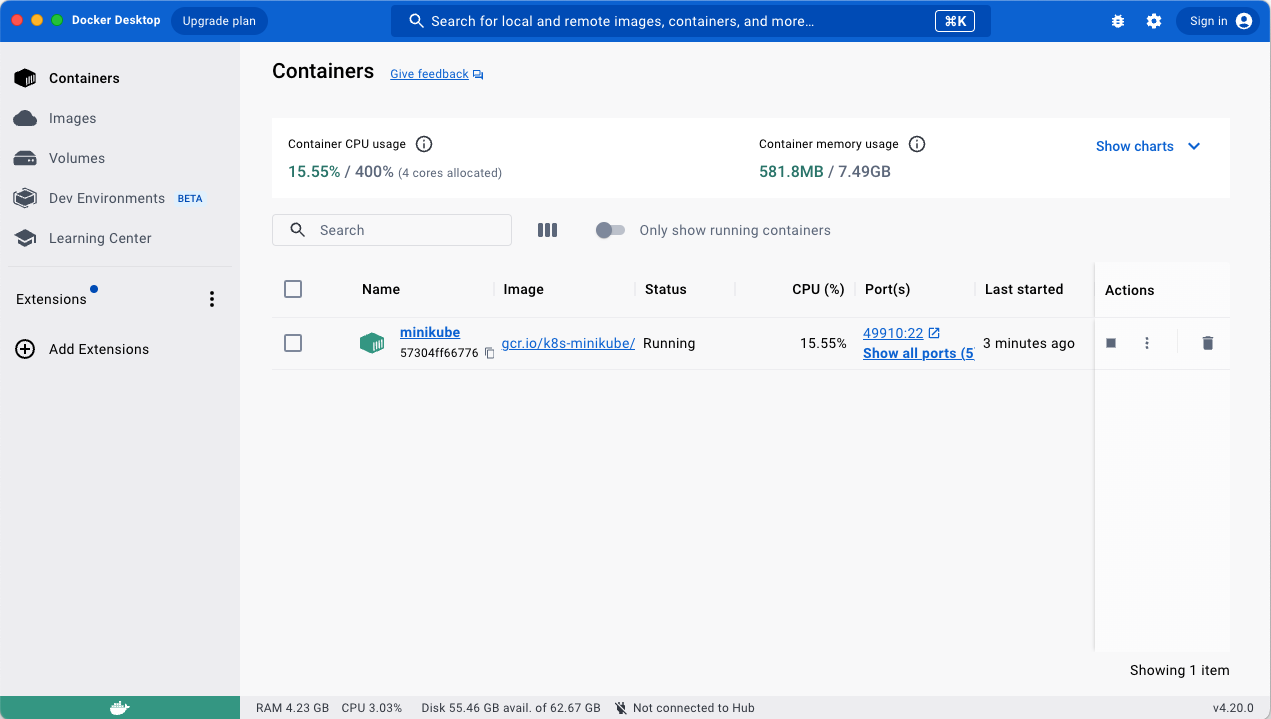
🏄 Done! kubectl is now configured to use "minikube" cluster and "default" namespace by defaultYou will also see a minikube container running in the Docker Desktop app.
In case Docker Engine is not running, you will get an error message that the Docker CLI cannot connect to the Docker daemon.
ERROR: Cannot connect to the Docker daemon at {path_to_docker.sock file}. Is the docker daemon running?To verify Minikube’s status, type in minikube status to see an output similar to the following:
❯ minikube status
minikube
type: Control Plane
host: Running
kubelet: Running
apiserver: Running
kubeconfig: Configured
You can also verify that the cluster has only one node by running kubectl get nodes. Note that only one line is shown in the output, corresponding to the only node present.
❯ kubectl get nodes
NAME       STATUS   ROLES           AGE   VERSION
minikube   Ready    control-plane   21m   v1.26.3
A quick note about the Docker and Minikube processes: Docker might restart automatically when you turn on your computer depending on the preferences set in its application. Minikube, however, will shut down when you turn your computer off and NOT automatically restart when you turn it back on. You will have to run minikube startagain manually.
Closing Thoughts and a Few Basic Commands
In this article, you learned how to set up a local Kubernetes cluster using Minikube on your Mac. A detailed tutorial on Kubernetes or Docker is outside the scope of this article. If you’re new to either of these, I’d recommend going to their respective documentations and diving in. For Kubernetes, I’d also suggest trying out the Hello Minikubetutorial on their website after understanding the basic concepts.
That being said, I’d like to leave you with a few commands related to Docker, Minikube, and kubectl that might come in handy.
docker ps - List all running Docker containers.
docker info - Display information about the Docker system.
docker restart - Restart a container.
minikube dashboard - Opens the Kubernetes dashboard in your default browser. I recommend running this in a new terminal tab as it will open a continuously running process.
minikube stop - Stop the Minikube cluster.
minikube delete - Delete the Minikube cluster.
kubectl get nodes - List all nodes in the cluster.
kubectl get pods - List all pods in the cluster.
In general, you can use the following help commands to know how to use the respective CLI tools. This is a standard pattern that is used across most CLI tools.
❯ docker --help
❯ minikube --help
❯ kubectl --help
This article was originally posted on Medium on 22nd July 2023.